Got a new sliding window AC and feeling a bit intimidated about installing it yourself? Don’t worry – it’s actually much easier than you might think. Whether your window slides up and down or side to side, I’ll show you exactly How to Install a Sliding Window Air Conditioner up and running safely.
What You Need to Know Before Getting Started
First things first – let’s make sure you understand what you’re working with. Sliding window ACs are built differently than regular window units. They’re made to fit windows that slide either left-to-right or up-and-down, which means the installation process has its own quirks.
Tools You’ll Actually Need (No Special Equipment Required)
Here’s what you should grab before you start:
- A drill (any basic drill will work)
- Regular screwdrivers
- A level (or download a level app on your phone)
- Measuring tape
- Pencil
- Safety glasses
- Work gloves
- Something sturdy to stand on
- Someone to help you lift (trust me on this one)
What Comes in the Box
Your AC should come with everything you need:
- The main unit (obviously)
- Side panels or window kit pieces
- Mounting brackets
- Foam weather strips
- All the screws and small hardware
- Instructions (which you can ignore since you have this guide!)
Step by Step: How to Install a Sliding Window Air Conditioner
Step 1: Measure Everything Twice
This might seem boring, but measuring wrong means starting over. And nobody wants to wrestle a heavy AC unit twice in one day.
If your window slides left and right:
- Measure how wide the opening is from one side to the other
- Measure the height too
- Check how deep your window sill is
- Make sure the opening is at least an inch wider than your AC unit
If your window slides up and down:
- You’ll need both height and width measurements
- Double-check that your window can actually hold the weight
- Look outside – make sure there’s nothing in the way
Step 2: Get Your Window Ready
Before you start hauling around a heavy AC unit, let’s prep your workspace.
Safety First (I’m Not Kidding About This)
- Clear out everything below the window – both inside your room and outside
- Take out any screens or storm windows that are in the way
- Give the window sill a good cleaning
- Make sure your helper is ready to go
Window Prep Work
- Open and close your window a few times to make sure it’s working smoothly
- Test that the window lock still works properly
- Clean out any dirt or leaves from the window tracks
- Check that the window frame isn’t wobbly or damaged
Step 3: Put in the Mounting Brackets
These brackets are what’s going to hold your AC unit, so don’t rush this part.
Getting the Brackets Right
- Line up the brackets where they need to go (check your AC’s manual for the exact spots)
- Mark where the screws go with your pencil
- Drill small pilot holes first – this stops the wood from cracking
- Screw in the brackets and make sure they’re level
- Give them a shake to make sure they’re solid
Don’t Make These Rookie Mistakes
- Forgetting to check if everything’s level (your AC will be crooked)
- Cranking down the screws too tight and cracking the frame
- Putting brackets too close to the edge where they might pull out
- Not thinking about where all that weight is going to sit
Step 4: Get Your AC Unit Ready
Now’s the time to prep your air conditioner before the heavy lifting starts.
Quick Checks Before You Lift
- Rip off all that plastic wrap and cardboard
- Make sure you got everything you paid for and nothing’s broken
- Find out how much this thing weighs (it’s probably on a sticker somewhere)
- Figure out which end is the front and which is the back
Last-Minute Prep
- Snap on any side panels that came with it
- Stick on the foam weather strips where they show you in the pictures
- Make sure the power cord looks good
- Check that the little drain holes aren’t plugged up with anything
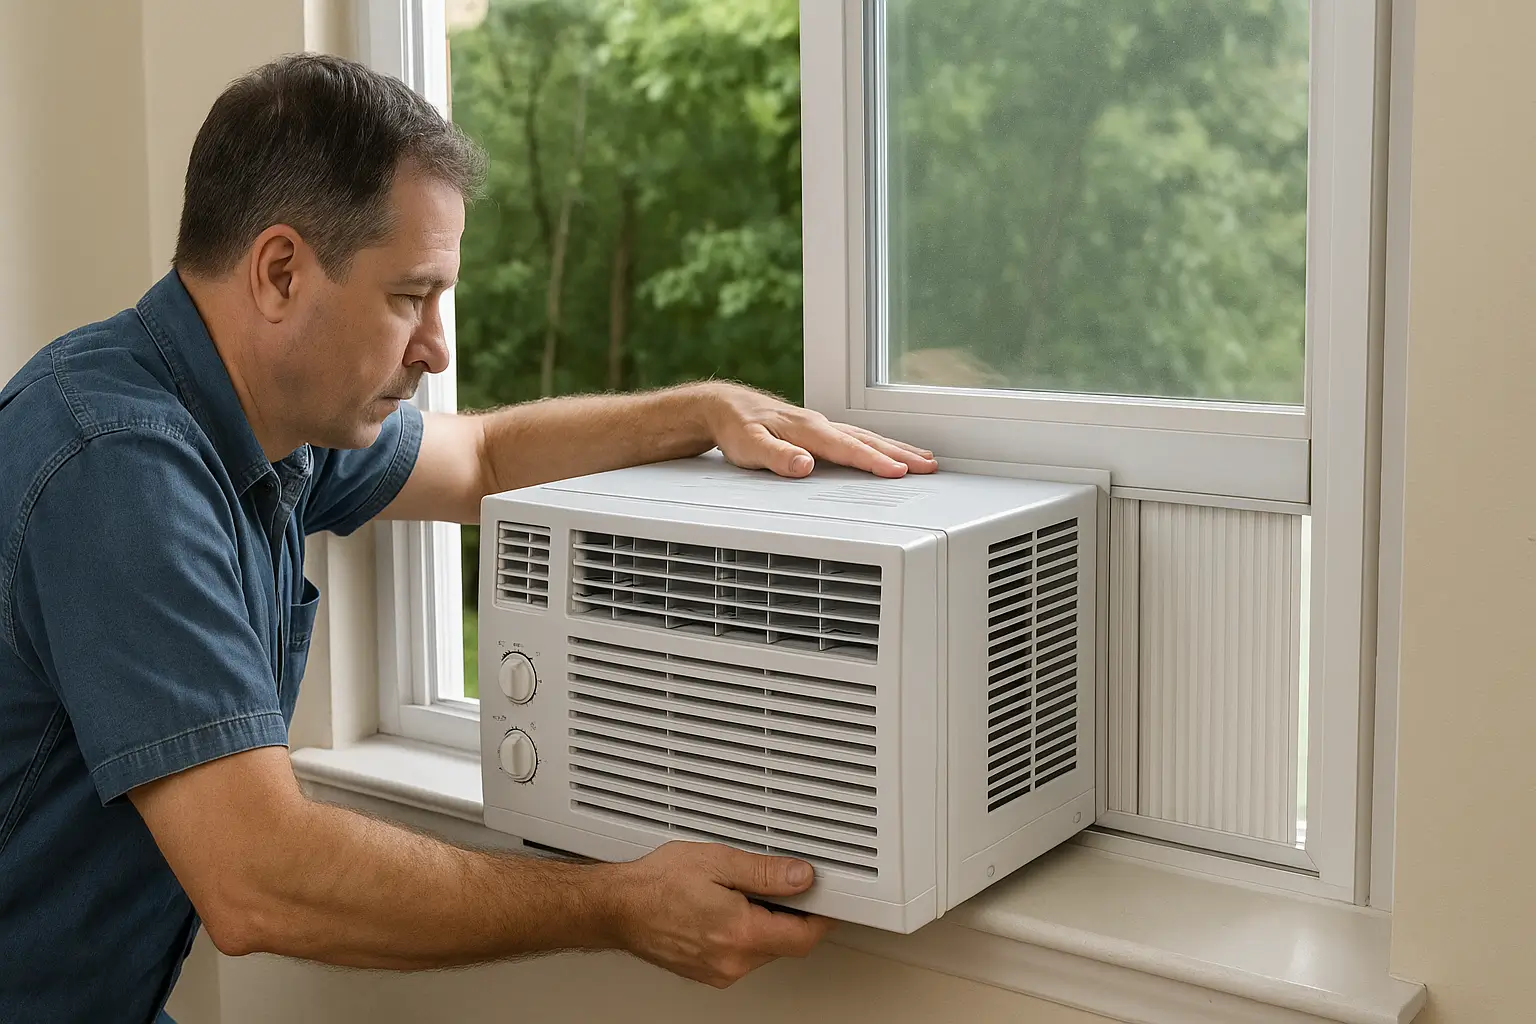
Step 5: The Big Moment – Installing Your AC
Okay, this is where things get real. These units can weigh anywhere from 50 to over 100 pounds, so don’t be a hero – get help.
How to Actually Do It
- Lift together – you and your helper need to coordinate this. Count to three and lift at the same time
- Set it on the brackets – try to get it centered as best you can
- Slide it into the right spot – most units have a specific position they need to be in
- Make sure it tilts out slightly – about a quarter inch so water can drain out
- Lock it down with whatever screws or clamps came with it
Making Sure It Won’t Fall Out
- Most of the weight should be sitting on those brackets you installed
- The window itself should only be supporting part of the weight
- Give it a gentle push – it shouldn’t wiggle around
- If something feels off, don’t ignore it
Step 6: Seal Up Those Air Leaks
If you skip this step, you’ll basically be air conditioning your entire neighborhood. Nobody wants a sky-high electric bill.
Getting It Sealed Up Right
- Put in the side panels to fill those gaps on either side
- Stick on the weather stripping anywhere you can see daylight coming through
- Don’t forget the top – there’s usually a gap between your AC and the top of the window
- Look for light leaks – if you can see light, air is getting through
Weather Strip Tips That Actually Work
- Cut the strips to fit exactly – don’t try to stretch them
- Press them down hard so they actually stick
- Pay attention to corners – that’s where most leaks happen
- You’ll probably need to replace this stuff next year
Step 7: Time to Test Everything
Don’t just plug it in and walk away. Let’s make sure this thing actually works the way it’s supposed to.
The Basic Tests
- Plug it in and fire it up – hopefully you hear it come to life
- Try all the buttons and settings – cooling, fan speeds, the whole deal
- Listen for weird noises – some humming is normal, but grinding or rattling isn’t
- Check that water drips outside – this means it’s draining properly
- Make sure your window still slides – you might need to get out in an emergency
Keep an Eye on It
- Watch it run for a few hours the first day
- Make sure cold air is actually coming out
- It shouldn’t shake the whole window when it’s running
- Double-check that you can still lock your window if you need to
When Things Go Wrong (And They Sometimes Do)
Even if you follow everything perfectly, sometimes stuff just doesn’t work right. Here’s how to fix the most common problems.
It Won’t Turn On At All
- Check if it’s actually plugged in (hey, it happens)
- See if you tripped a circuit breaker
- Make sure all the safety switches clicked in properly
- Check if you accidentally damaged something when you installed it
It’s Running But Not Getting Cold
- Look for air leaks around your installation
- Make sure it’s tilted out like it should be
- Check that those side panels are in right
- Clean or replace the filter – it might be clogged already
It’s Making Too Much Noise
- Check if it’s sitting level and secure
- Tighten up those mounting brackets
- Make sure it’s not touching the window frame anywhere
- Double-check that all the panels are attached properly
Keep Your AC Running Like New
A little maintenance goes a long way. Don’t wait until it breaks to pay attention to it.
Stuff You Should Do Every Month
- Clean or swap out the air filter (seriously, set a phone reminder)
- Clear away any leaves or junk that built up outside
- Check if the weather strips are still doing their job
- Give those mounting brackets a quick look once a year
Seasonal Checklist
- Spring: Take off any covers and check for winter damage
- Summer: Keep those filters clean and watch how it’s running
- Fall: Clean everything really well and cover it up if you’re leaving it in
- Winter: Either take it out or get a good cover for it
Save Money on Your Electric Bill
Your AC doesn’t have to cost a fortune to run. Here are some tricks that actually work.
Smart Ways to Run Your AC
- Set it to 78°F when you’re home – any colder and you’re just burning money
- Bump it up a few degrees when you’re not around
- Use a ceiling fan to move the cold air around better
- Close your blinds during the hottest part of the day
More Ways to Cut Costs
- Get a timer so it’s not running 24/7
- Maybe invest in a smart thermostat if you’re into that
- Keep up with maintenance – a dirty filter makes it work harder
- Fix any air leaks you find – they’re like throwing money out the window
Sometimes You Need to Call for Help
Look, there’s no shame in admitting when a job is too big for a DIY project. Here’s when you should just pick up the phone.
Times to Get a Professional
- If your unit weighs more than 100 pounds
- When you’re dealing with a second-story window or higher
- If your window setup is weird or complicated
- When you need electrical work beyond just plugging it in
- If local codes require professional installation
Safety Reality Check
- Never try to muscle a heavy unit by yourself
- If you’re scared of heights, stay on the ground
- Don’t start cutting into walls or window frames without knowing what you’re doing
- Sometimes paying for installation is worth the peace of mind
Conclusion
Installing a sliding window air conditioner successfully requires careful planning, proper tools, and attention to safety. By following this step-by-step guide, you can ensure your AC unit operates efficiently and safely throughout the cooling season.
Remember that proper installation not only affects performance but also impacts energy efficiency and safety. Take your time with each step, don’t hesitate to ask for help with heavy lifting, and always prioritize safety over speed.
With your sliding window air conditioner properly installed, you’ll enjoy comfortable indoor temperatures while knowing your unit is secure and operating at peak efficiency. Regular maintenance and proper operation will keep your investment running smoothly for years to come.

